Next >>
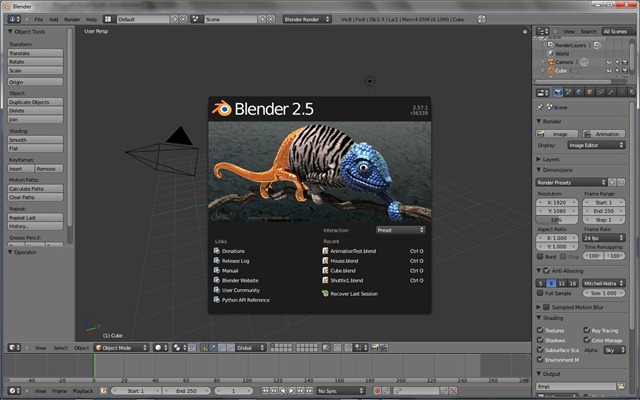
I have been playing about with blender, I know Ed is a big fan of the XSI Soft Image tool, but I never really got on with it, mostly due to me not spending any quality with it. So, why Blender? Well, first off, it’s free! There are also loads of tutorials for it, loads on Youtube and the host site, Blender.org has a tonne. The latest draft of Blender, 2.57b is a great improvement on the later versions, but like all the other modeling tools I have looked at it still helps if you know the keyboard short cuts to help navigate around the UI.
With this set of short posts I am hoping to introduce you to Blender 2.57b and how you can then get those objects exported and rendered in your XNA projects.
Where can I get the goods!
Well, guess where? yep, the host site Blender.org as you will see there is a download tab and link off there main page where you can download the application. So pick the flavor you want I went with the 32 bit version even though I run a 64 bit OS, mainly because I when ever I have gone to use a 64 bit version of Blender it just didn’t play well. So I went safe and took the 32 bit version.
How do I use this crazy tool!
OK, first look at the UI and it’s quite busy, but it’s all pretty strait forward. What we have to start with are five windows, at first the windows in blender are not that easy to spot, but here are the five we get to start with.


OK, so we have a lot of screens, but as I say, we only need to focus on the last screen for now, we will touch on the other screens and how to create and close more, but I think you have enough on your plate with these five and with what we can do with the 3D view window. As you can see Blender gives you a cube to start with, we will use this throughout the rest of the post, we will make some simple modifications to to and export it to an FBX file then use it in an XNA 4.0 project.
3D View
So, I guess this will be the work horse screen for this post. In this window we will do the majority of our modeling, the first thing we will do is look at how we can move around and view the 3D space. So, off the bat we can change the view with a hot key, so on your number pad hit 5, this switches the view between perspective and orthographic, as you hit the 5 key you can see the view change and also the little description in the top right corner of the window.


So, how do we translate and rotate our 3D view, well wheel have a mouse, so, I just use the roller to translate in the direction I am facing, but if you don’t have a mouse like that you can use the + and – keys. Again, with my mouse, to rotate around the scene I click my mouse wheel, hold it down and can rotate the scene, you can do the same with the number pad with the 8, 4, 6 and 2 keys.
Export to FBX
OK, we have this box model, how do we export it so we can use it in XNA? Well, this, for now is easy, simply click File in the Info window (remember, the one at the top) and you will get a drop down menu list like this:

Hover over the Export option, and you will get another drop town like this:

And pick the Autodesk FBX (.fbx) option and you will get a screen like this:

Now the handy thing about this screen is you can set up book marks to remember where you want to save your stuff to, we will create one now so we can copy the model directly into the content folder of our project.
In the top of the screen type in the path of your content folder for the model, then, under the Bookmarks panel, hit the Add button

So now, I can get to this folder each time I go to save a model. Now, under the address bar at the top, change the name of the model from untitled.fbx to cube1.fbx. Further down that left hand side of the screen are the Export FBX options, first thing we will do is scale down our cube, a blender unit is a big space, I am going to set the scale to .01. You can do this by either clicking on the arrows either side of the value or simply clicking on the value in the center and typing what you want in there.

You can also see that Blender by default sets other export options, I will disable X 90, this rotates the exported mesh along the X axis 90 degrees, in blender Z is up so this can be useful if you forget to model using Y as up, but for this export it really does not matter, I am doing here as I try to model with the Y axis as up, Ill come to that later. I am also switching off the Empty, Camera, Lamp and Armature and switching off smoothing and as there is not animation, switch off Enable animation and Key frame optimization, you should have a Export FBX panel like this:

And now we hit the Export FBX button up at the top next to the address bar. After a second or two, we should now have a Cube1.fbx file in the model folder of our content project. In our XNA project we can now just add the existing item:

So we can now render this mesh in XNA, just like we can any other FBX mesh.

Now, this is all pretty simple stuff I know, but this is just a start. In the next post I will show you how to UV map and texture your cube, and here is what I hope to cover in future posts:
- Creation of normal maps.
- Creation of specula maps.
- Creation of dual textures.
- Skinned animation.
Next >>


